Dieser Artikel skizziert die Navigation in der Cintoo VR Experience -Anwendung sowohl im Desktop- als auch im VR-Modus. Helfen, die Struktur und Visualisierung von Daten sowie Hauptschnittstellenelemente und verfügbare Werkzeuge besser kennenzulernen.
INHALTSVERZEICHNIS
- Desktop Mode
- VR Mode
Desktop Mode
Zuerst klicken Sie auf Projekte Tab auf der linken Seite und wählen Sie dann ein Projekt aus, um es in VR zu erleben. Nachdem das Projekt geöffnet wurde, wählen Sie im Ressourcen und Arbeitszonen Tabs Objekte zur Aktivierung aus..

Durch Klicken auf Abmelden oben, werden Sie zum Anmeldemenü zurückgeleitet.
Workzones and Resources
Workzones tab reflects project's work zone structure with number of objects indicators in blue.
Links von jeder Arbeitszone befinden sich anklickbare Symbole:
 Das offene Augensymbol bedeutet, dass eine Arbeitszone aktiv ist
 Ein geschlossenes Auge bedeutet, dass eine Arbeitszone inaktiv ist
Aktivieren Sie die benötigten Arbeitszonen, um deren Inhalt im Resources -Tab zu sehen.
Resources Registerkarte enthält nur aktive Arbeitszonen mit allen Scan- und Modelltypenobjekten.
Links von den Objekten im Resources Tab befinden sich klickbare Symbole:
- Das offene Augensymbol bedeutet, dass ein Objekt aktiv ist.
- Geschlossenes Auge bedeutet, dass ein Objekt inaktiv ist
 Ziel ermöglicht direkt von Resources tab
- Nach dem Festlegen der anzuzeigenden Datenmenge können die Registerkarten durch Klicken auf Arbeitszonen und Ressourcen erneut minimiert werden.
Anzeigemodus Panel
At the top of the screen in the middle Display modes panel that controls visualization is located:

- RGB – farbiges Bild aus Scannerdaten
- X-ray – Transparentmodus zum Vergleich mehrerer Scans
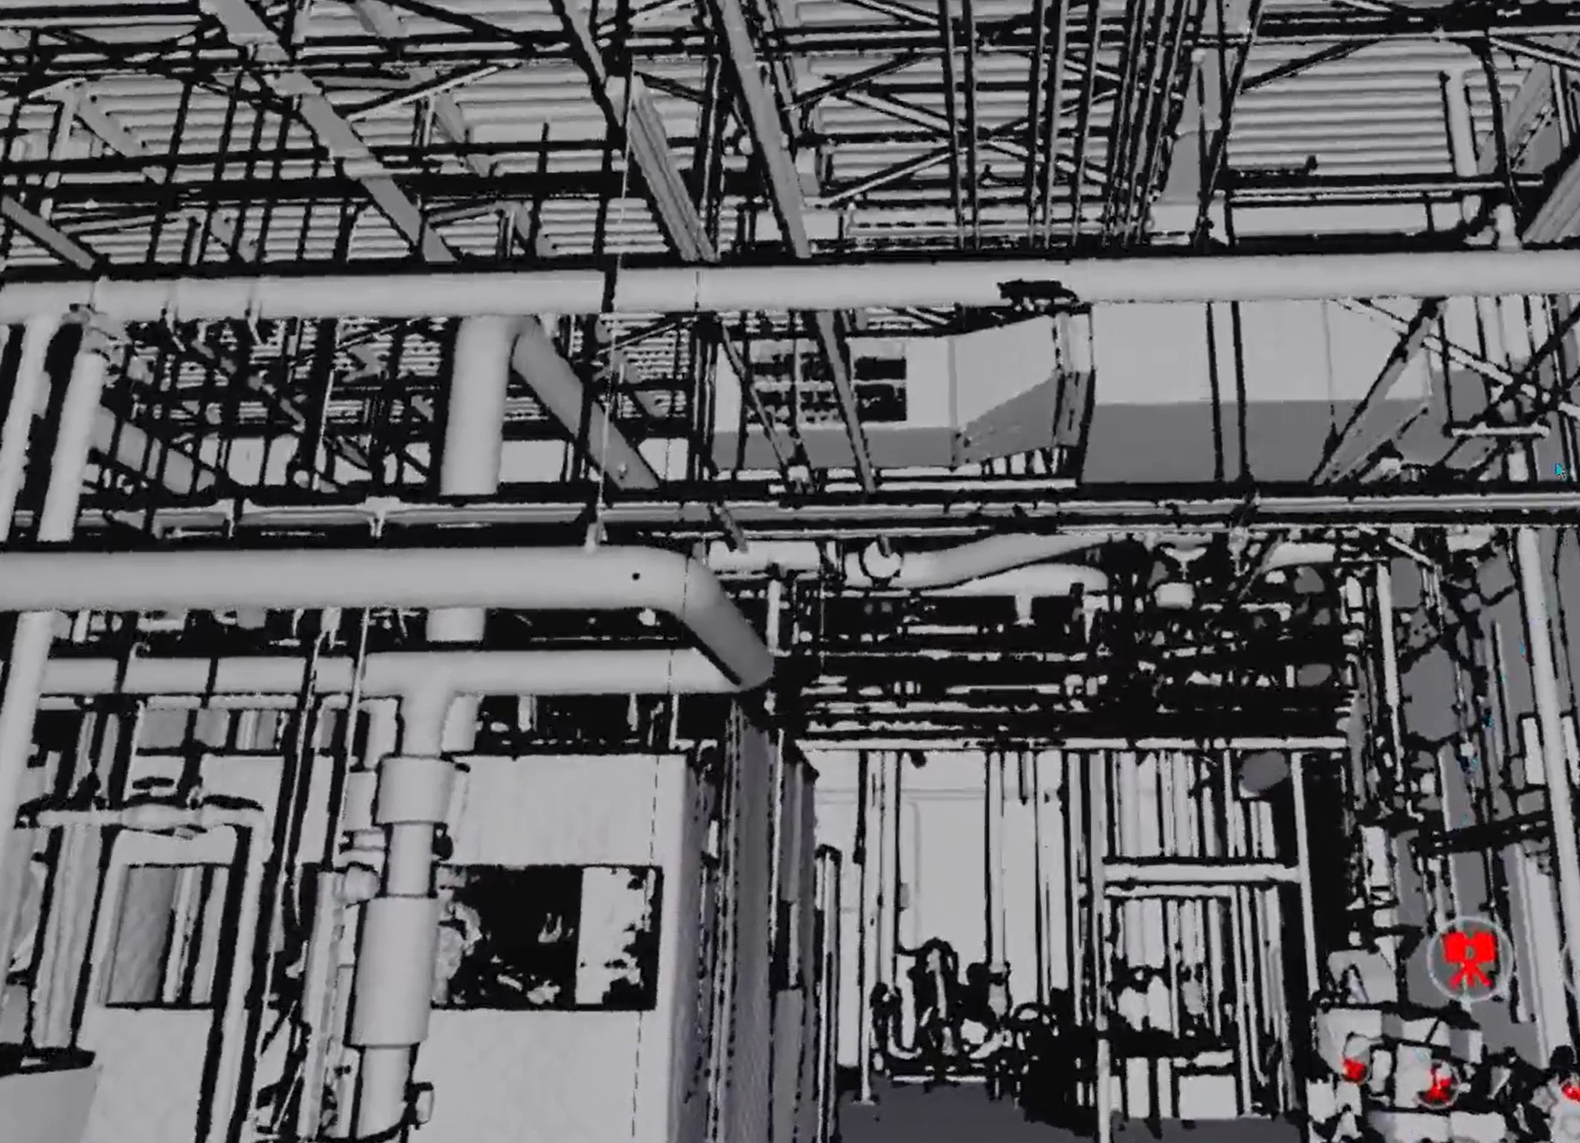
- Oberfläche - Netz, generiert aus Scandaten
- Innen- – innerhalb von Gebäuden modus ermöglicht das Abdunkeln der Umgebung
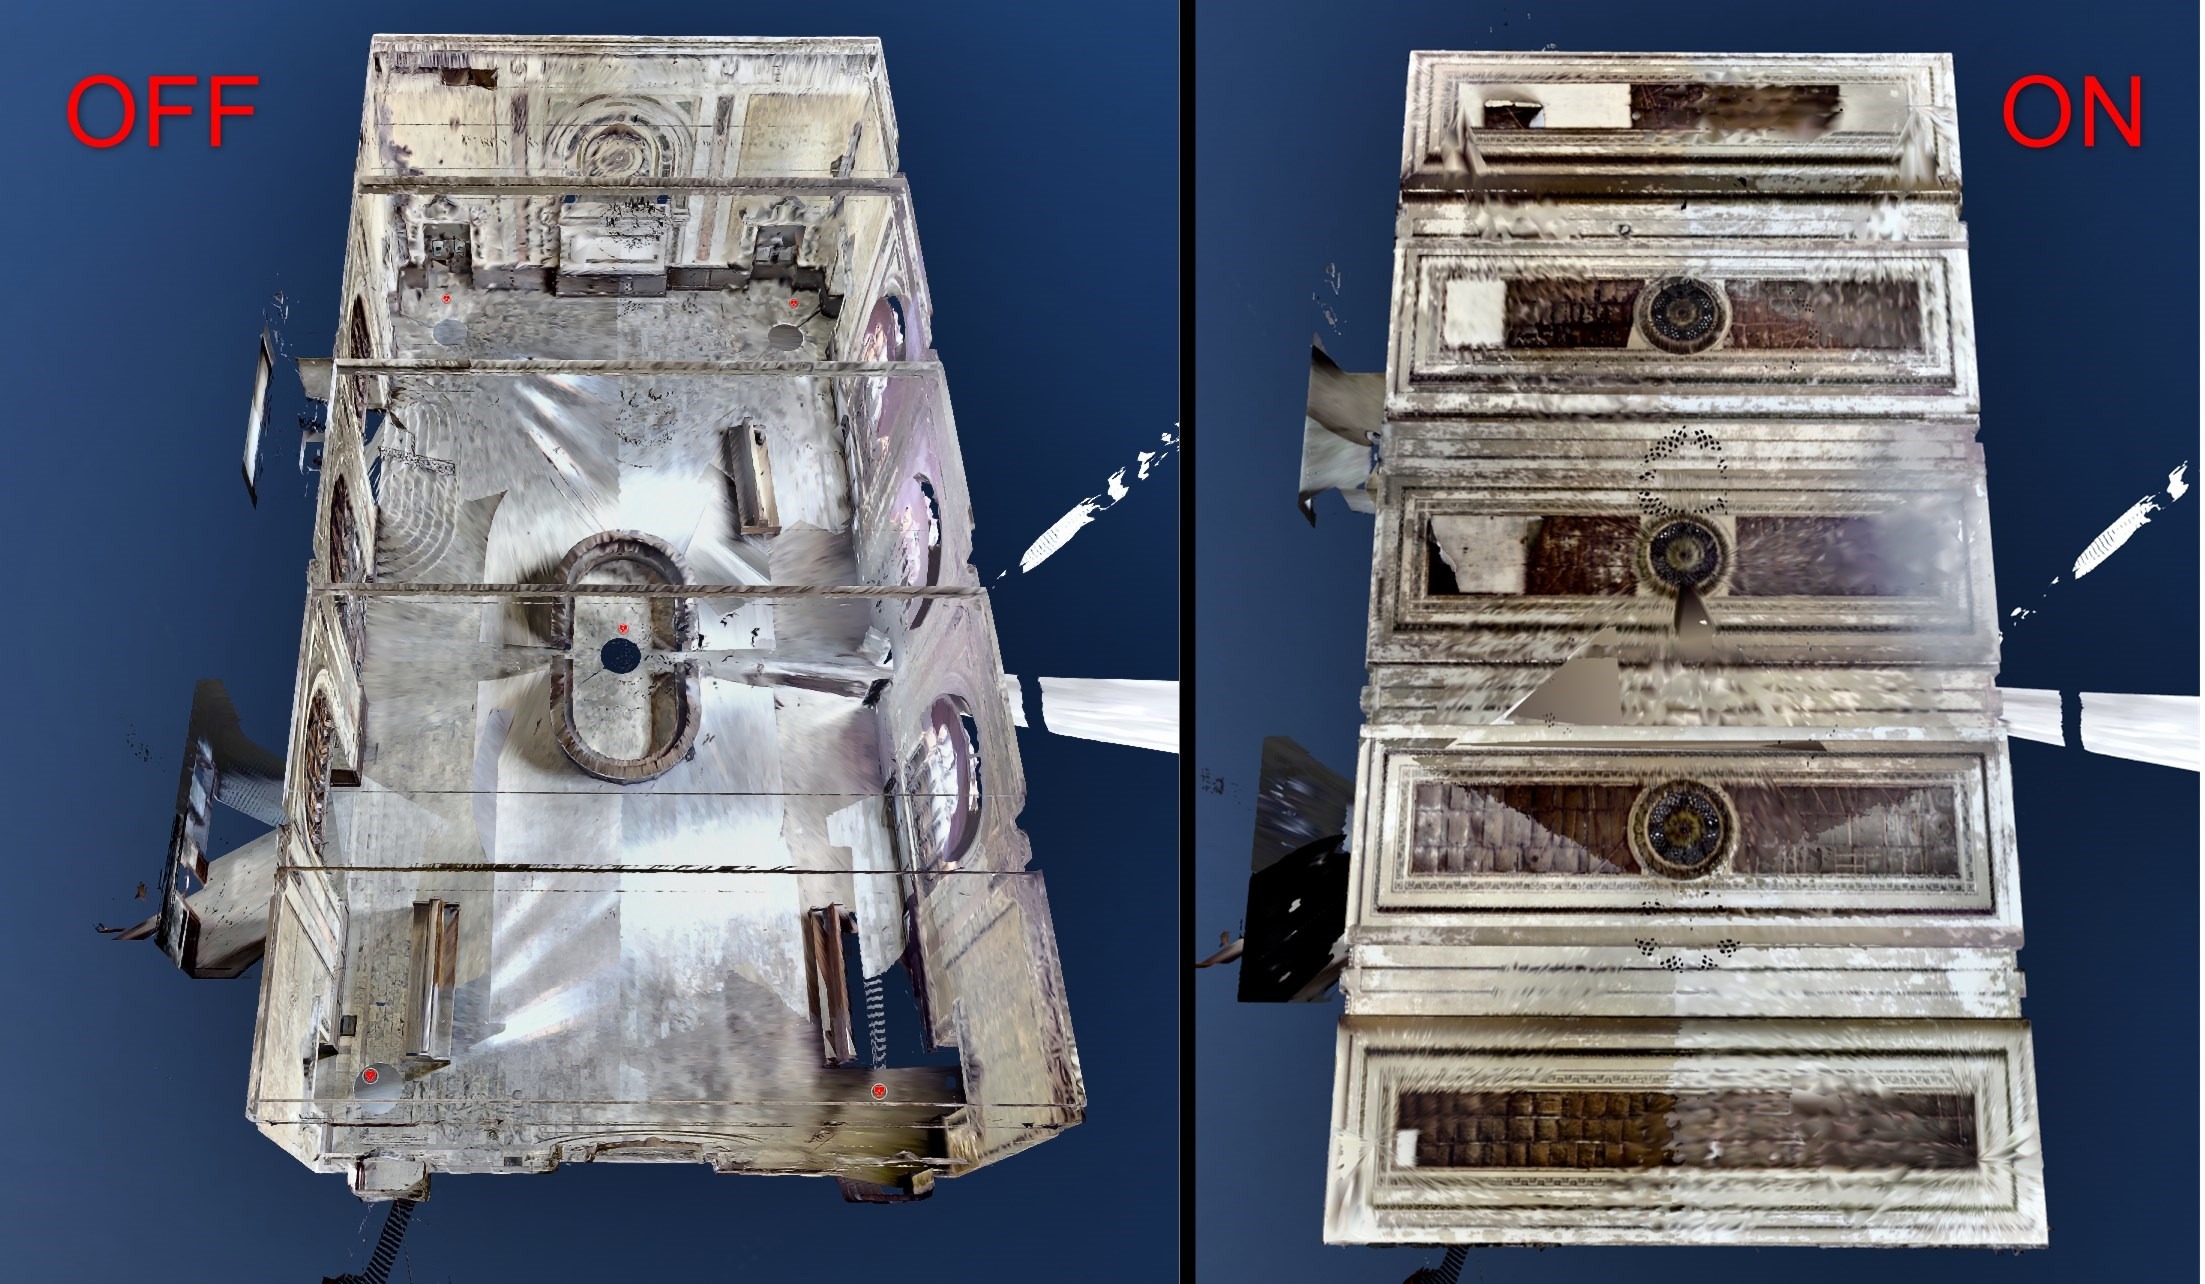
- Rückseite – ermöglicht das Verbergen von Rückseiten von 3D-Netzflächen, um das Innere von Gebäuden von außen sehen zu können und die Szene von unnötigen Netzstücken zu bereinigen
Navigation
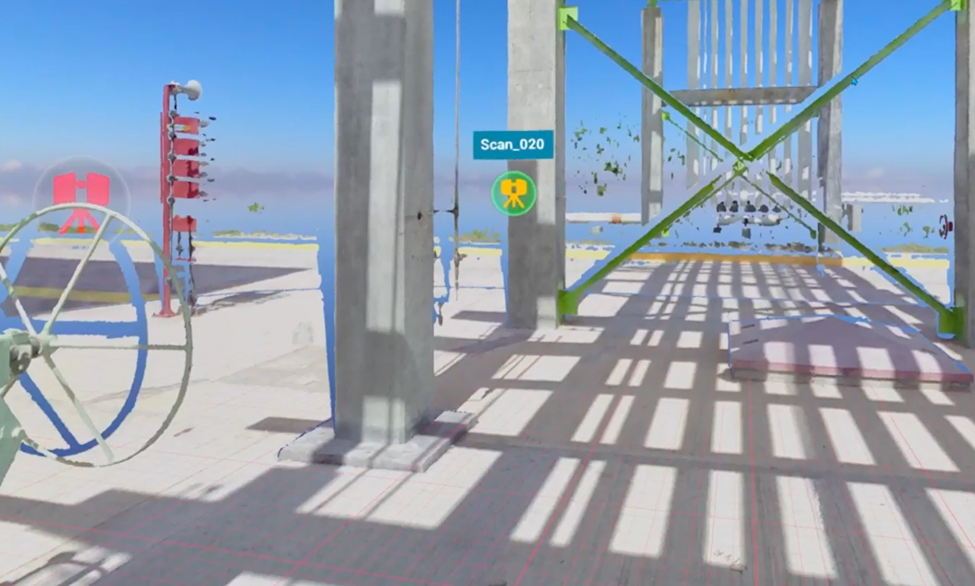
Im Desktop-Modus der Cintoo VR Experience-Anwendung ist es möglich, von Scan zu Scan zu navigieren oder im Flugmodus frei im 3D-Raum zu bewegen. Klicken Sie auf schwebende Scanner-Symbole oder bewegen Sie sich frei, indem Sie eine Maustaste gedrückt halten und die Maus bewegen; verwenden Sie Shift, um die Kamera zu drehen.
Options
Im oberen Bedienfeld das Options -Menü öffnen, um Visualisierungsparameter in der Anwendung zu ändern und zusätzliche Einstellungen auszuwählen.

- Anmerkungen vorladen - ermöglicht das Abrufen von Anmerkungen für das ausgewählte Projekt.
Ähnlich wie Aus Cloud abrufen in Anmerkungen. - VR Tunnel Vision - Aufgrund der Änderung der Navigationsbewegung können Benutzer diese Option aktivieren, um die Bewegung flüssiger zu gestalten. Kann auch über das Menü VR-Tools aktiviert werden.
- Visuelle Qualität - gleiche Einstellung wie auf der Login-Seite, ausführlich beschrieben in Discover the Application
- Scans Qualität - gleiche Einstellung wie auf der Login-Seite, ausführlich beschrieben in Discover the Application
VR Mode
Connection
- für Meta-Geräte - danach Verbindung mit dem Meta Quest-Link vom Gerät aus herstellen, indem Sie zu Einstellungen navigieren, Link wählen, und auf Starten klicken. Oder wählen Sie Link im Schnelleinstellungen-Menü.
Detaillierte Anleitung von Meta: Meta Quest mit dem Meta Quest Link einrichten - für andere Geräte - Verbindung mit dem PC herstellen.
Um in den VR-Mode zu wechseln und das Streaming zum Headset zu starten, klicken Sie auf Virtual Reality in der unteren rechten Ecke.

Controllers
Der beim Start der Anwendung ausgewählte Hauptcontroller heißt Navigation controller. Die Rechtshändereinstellung hätte A- und B- Tasten und wird verwendet, um in einem Projekt zu navigieren.
Der zweite Controller heißt Tools-Controller. Es hat X- und Y-Tasten, in der Rechtshändereinstellung und sein Gebrauch ist funktional. Das Interface zur Navigation von Projekten und Daten kann durch Drücken der B-Taste. Navigations- und Visualisierungssteuerungen sind die gleichen wie im Desktop-Modus.

Navigation Methods
Cintoo VR Experience supports multiple navigation methods depending on your hardware setup. Each method below shows which platforms support it - use legend to find what works on your device, and check controls column for hardware-specific inputs.
Platform legend
| Icon | Platform |
|---|---|
 | VR - headset (Meta Quest, etc.) |
 | Desktop - PC with mouse & keyboard |
 | Igloo - large-format immersive display |
 | Web - browser-based viewer (standard Cintoo web experience) |
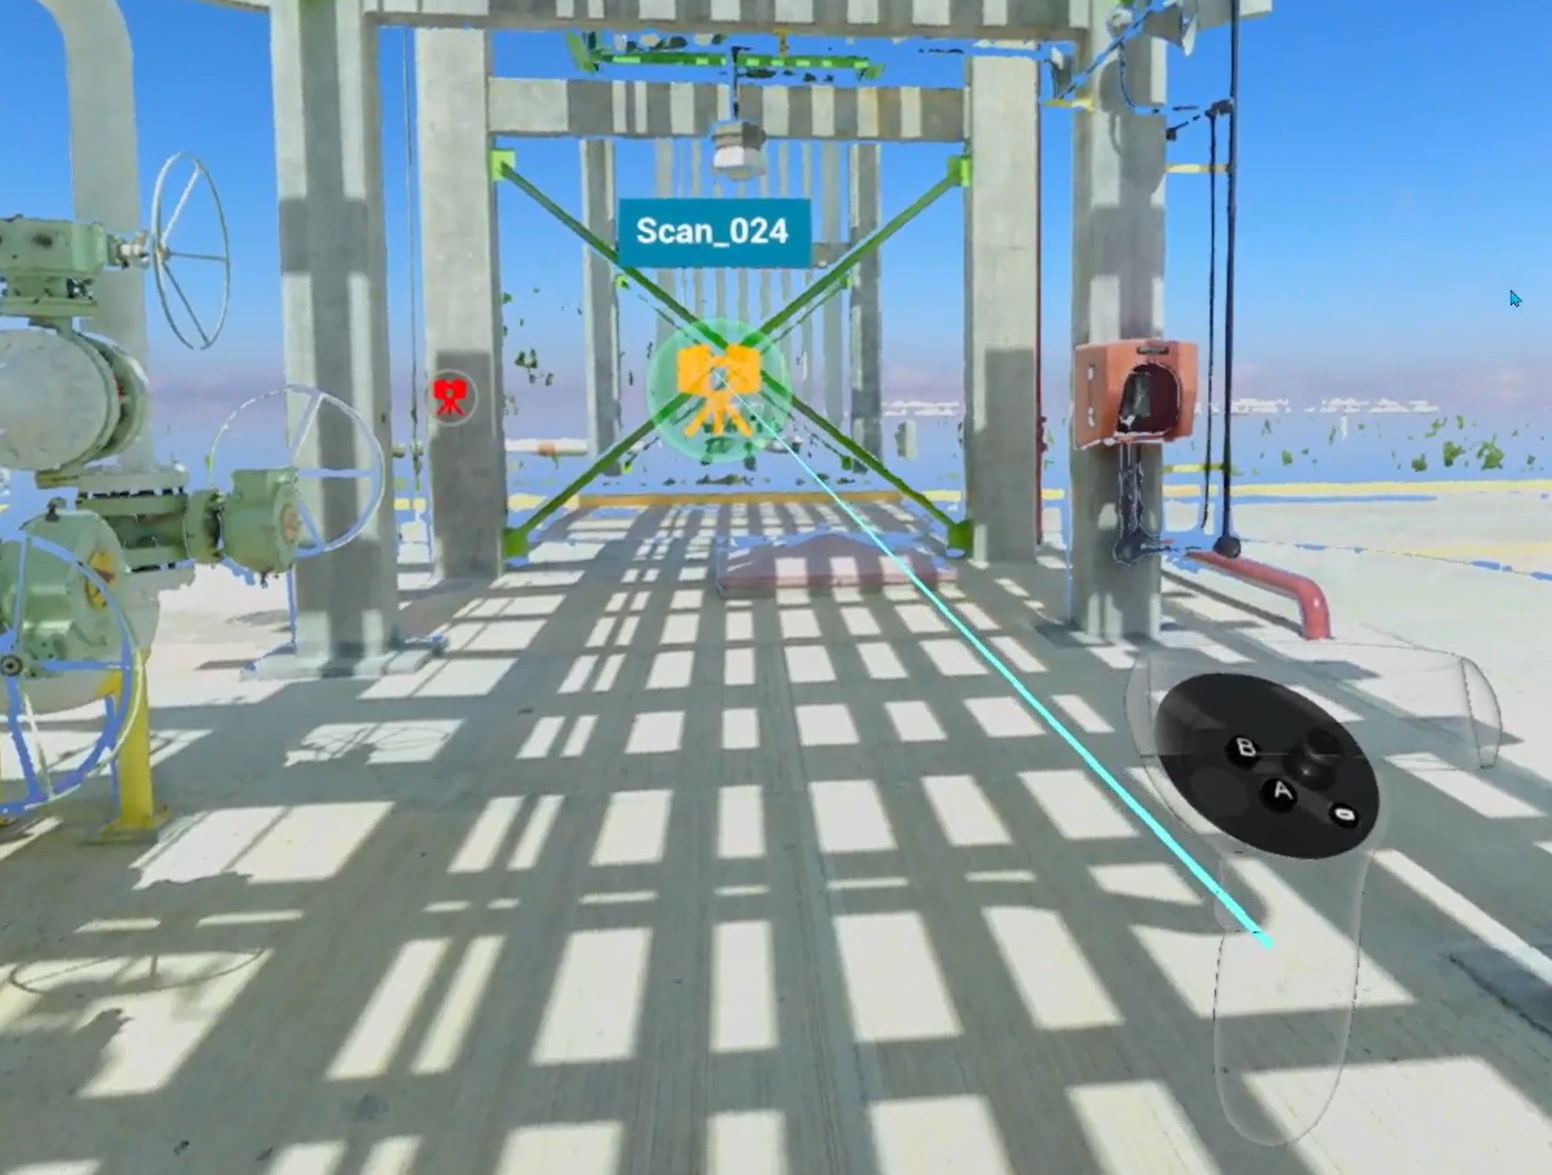
VR: Navigation controller projects a dynamic parabola that follows hand movement and adjusts in length - used as the primary targeting mechanism for scan selection, teleportation, and switching to Fly mode.
Core Locomotion
Methods for physically moving and orienting yourself within a scene - turning, walking, flying, and repositioning the view.
Look Around
Rotate the camera to look in any direction around you.
| Platform | Controls |
|---|---|
 VR VR | Physically turn your head |
 Desktop Desktop | Click and hold mouse wheel button, then move the mouse; hold Shift to turn camera |
 Igloo Igloo | Physically look and move around within tracked space |
 Web Web | Right-click + left-click drag (3D navigation look around) |
Walk Around
Move freely through physical space mapped onto the scene.
| Platform | Controls |
|---|---|
 VR VR | Walk naturally within the area around you |
 Igloo Igloo | Walk within Igloo tracking space |
Schnelle Drehungen
Snap-rotate view in 90-degree increments - useful when physically turning is limited.
| Platform | Controls |
|---|---|
 VR VR | Press Navigation controller joystick left or right |
 Igloo Igloo | Use 90-degree turn input on controller |
Pan
Shift viewpoint along an axis without rotating - useful for fine positional adjustments or aligning view.
| Platform | Controls |
|---|---|
 VR VR | Hold Tools controller grip to enter Pan mode, then move controller in desired direction. Works in both Egocentric and Exocentric scale. |
 Desktop Desktop | Vertical pan: hold right mouse button + drag. Horizontal pan: hold left mouse button + drag. Field of view: scroll mouse wheel. |
 Web Web | Vertical pan: right-click drag. Horizontal pan: left-click drag. Field of view: scroll wheel (3D navigation). |

Find more details in Control tips menu in Desktop mode or in the dedicated section Pan Mode.
Fly mode
Move freely in all directions through 3D space, imitating flight.
Works in both Egocentric and Exocentric scale.
Note: Fly mode activates Turbomesh, using nearby active scans and models for real-time 3D reconstruction.
| Platform | Controls |
|---|---|
 VR VR | Starting from Teleport mode (blue parabola), click Navigation controller joystick 3 times - parabola cycles through yellow → pink → off. Once parabola disappears, Fly mode is active. Vertical movement: Tools controller joystick. Horizontal movement: Navigation controller joystick. |
Umlaufbahn
Rotate entire scene in parallel to the ground while your position stays fixed - useful for inspecting from multiple angles.
| Platform | Controls |
|---|---|
 VR VR | Hold both controller grips simultaneously. Move hands in opposite directions - one forward, one backward - as if rotating a large object. A line appears between controllers to confirm two-handed mode. |
 Web Web | Use 3D navigation Orbit control. |
Find more details in Control tips menu in Desktop mode or in the dedicated section Orbit.
Jump Around
Methods for jumping directly to a specific location or scan without continuous movement.
Scan to Scan
Jump directly to viewpoint of a specific scan by selecting it in scene or in Resources panel.
Note: display is limited to single scan when navigating this way.
| Platform | Controls |
|---|---|
 VR VR | Point Navigation controller at a scan icon - parabola becomes a straight line and icon highlights. Press trigger to go there. |
 Desktop Desktop | Click any floating scanner icon in 3D view, or click Target icon next to a scan in Resources tab. |
 Igloo Igloo | Point controller at a scan icon until it highlights, then press trigger. |
 Web Web | Click scan icon in scene. |
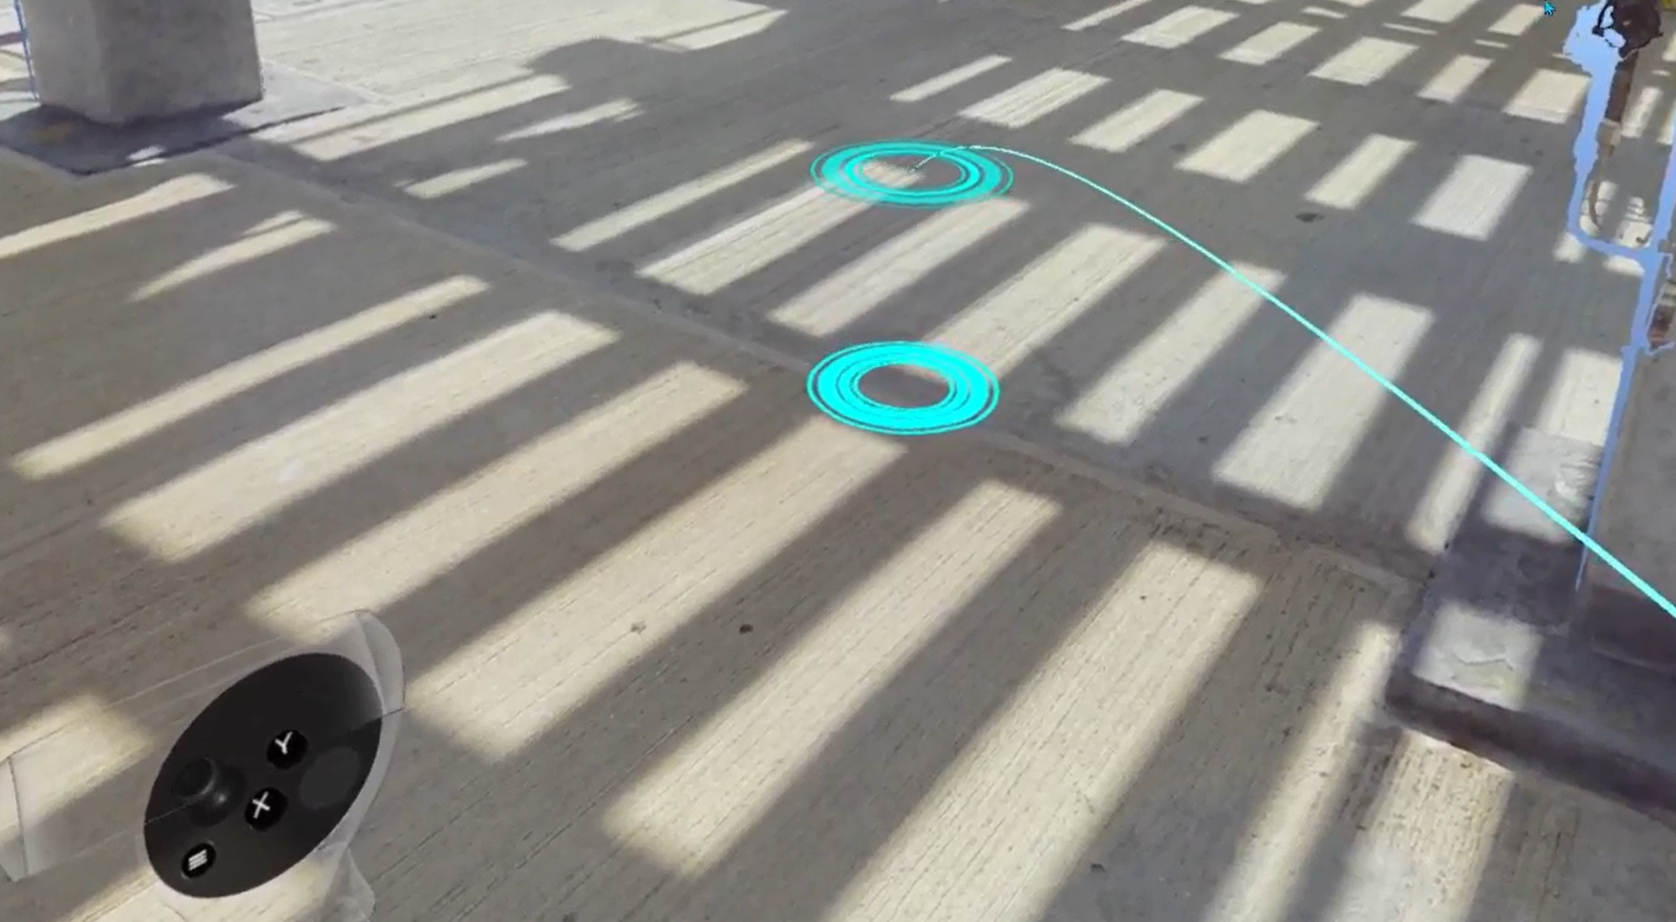
Teleport
Free teleportation to any floor-level position in scene.
Warning: teleportation is disabled while any interface menu is open.
| Platform | Controls |
|---|---|
 VR VR | Aim parabola - a red/blue floor grid and a target marker appear. When both targets merge, landing spot is locked. Press Navigation controller trigger to jump there. To set view height before teleporting: press X on Tools controller, then adjust with Navigation controller joystick up/down. Height is saved across all subsequent teleports. |
 Igloo Igloo | Aim controller at desired floor location and press trigger. |
 Web Web | Hold Shift and click target location. |
See also: Change Teleportation Height.
Scaling
Methods for changing your perspective scale - from 1:1 ground-level exploration to a full site overview and anywhere in between.
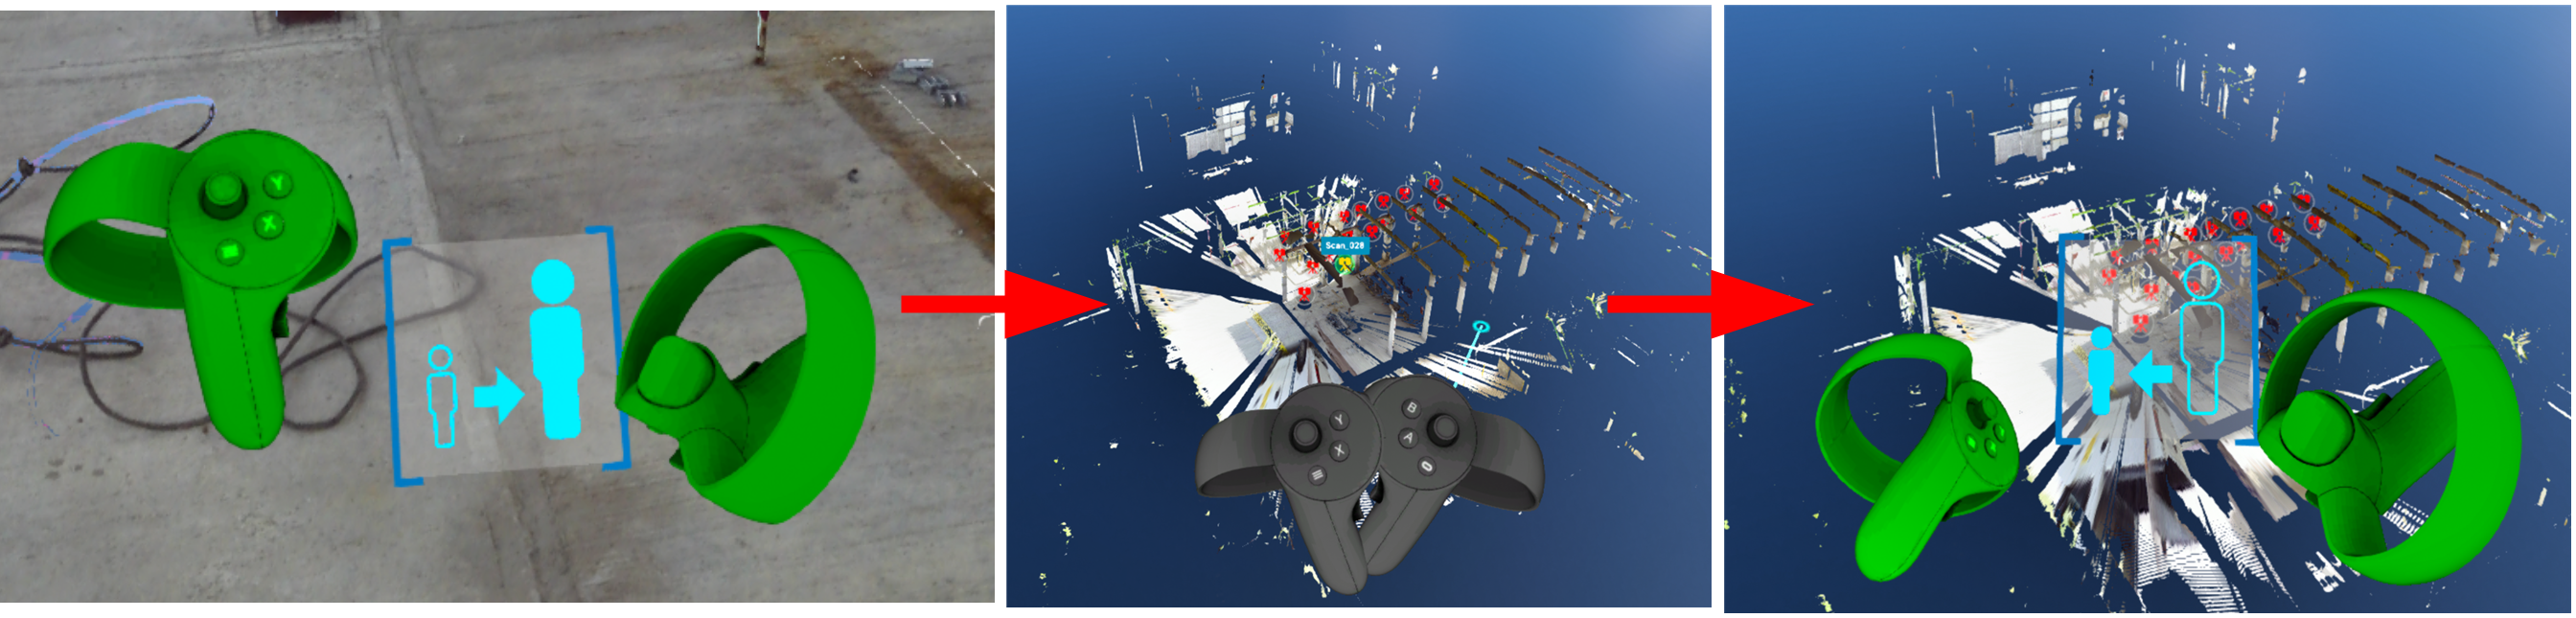
Exo / Egocentric Scale
Switch between 1:1 human-scale exploration (Egocentric) and a miniature overhead view of the full site (Exocentric). Exocentric mode enables full-site observation, architectural walkthrough evaluation, spatial relationship assessment, and measurement of distances beyond 1:1 scale.
| Platform | Controls |
|---|---|
 VR VR | Enter Exocentric: point Navigation controller toward the sky - a special indicator appears - then press trigger. Return to Egocentric: repeat same upward gesture (reverse indicator shown), or use teleport to jump back to ground level. Exo/Ego |
 Web Web | Click home / recenter camera button in 3D navigation controls. |
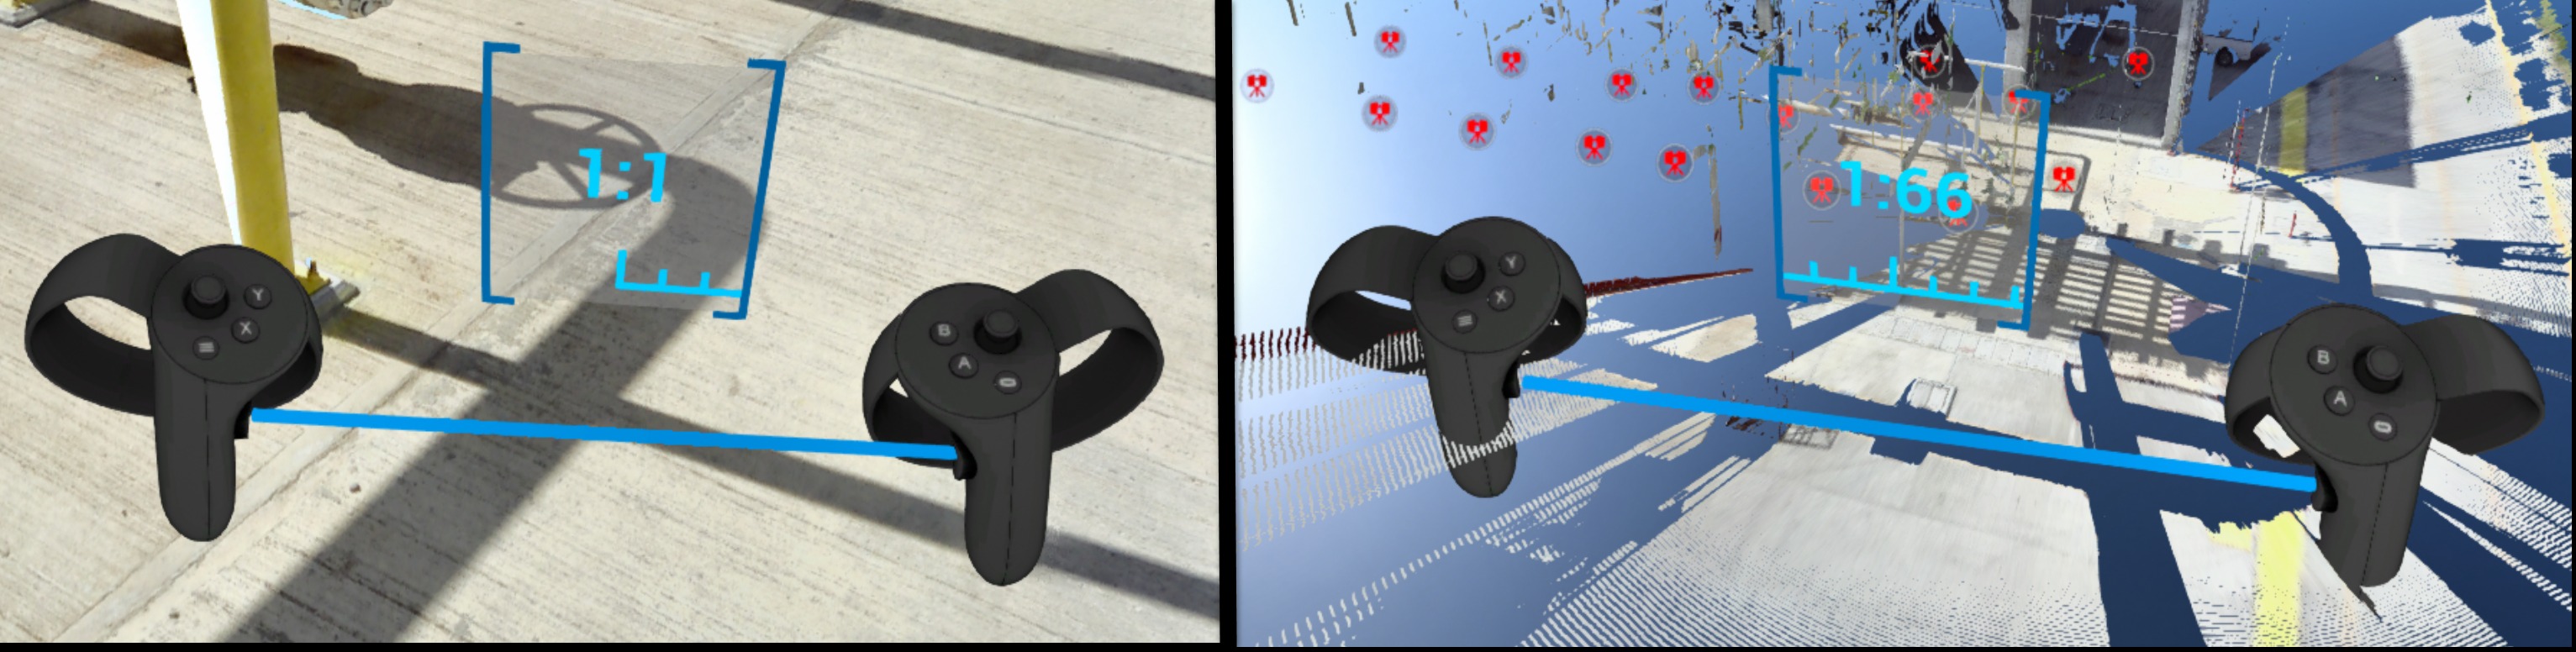
Dynamisches Skalieren
Continuously zoom scene between 1:1 and 1:250 scale - useful for navigating between site-wide overview and detail inspection without leaving your position.
| Platform | Controls |
|---|---|
 VR VR | Hold both controller grips simultaneously. Spread hands apart to zoom in (toward 1:1). Bring hands together to zoom out (toward 1:250). A scale indicator appears between controllers showing current ratio. |
 Web Web | Scroll mouse wheel, or use 3D navigation Dynamic Scaling control. |
Find more details in Control tips menu in Desktop mode or in the dedicated section Dynamic Scaling.
Navigation Aids
Settings and modes that assist navigation, reduce motion discomfort, or control how the scene environment is displayed.
Tunnel Vision
Reduces motion sickness by narrowing peripheral field of view during locomotion (e.g. while teleporting).
| Platform | Controls |
|---|---|
 VR VR | Enable from Options menu (top panel in Desktop mode before entering VR) or from VR Tools Menu once in headset. |
Vision (Gaze) Control
Navigate using head gaze alone - no active controller input required. Useful when you want hands-free movement.
Note: display is limited to single scan when using gaze-based navigation.
| Platform | Controls |
|---|---|
 VR VR | Let your arms hang at your sides - controllers disappear from view. Orient your gaze toward a scan icon. Once icon highlights, press Navigation controller trigger to go there. |
Yellow / Magenta Gaze-Based Navigation
Special modes to control teleportation.
| Platform | Controls |
|---|---|
 VR VR | Teleport helpers |
Display Modes
Switch how point cloud data is rendered. Available modes vary by platform.
- RGB - colorful image taken from scanner data
- X-ray - transparent mode for comparison of multiple scans
- Surface - mesh generated from scan data
- Heightmap - scene colored according to object heights (VR and Igloo only)
| Platform | Available modes |
|---|---|
 VR VR | All modes except Intensity and 2D panoramic. Switch from VR Tools Menu or press Y on Tools controller to cycle. |
 Desktop Desktop | All modes except heightmap, intensity, and 2D panoramic. Available in Display Modes panel at top of screen. |
 Igloo Igloo | All modes except Intensity and 2D panoramic |
 Web Web | All display modes |

Heightmap (VR)
Displays scene colored according to object heights. Clicking Heightmap button changes display mode and shows a color legend. Move window by grabbing title of legend with Navigation controller trigger.
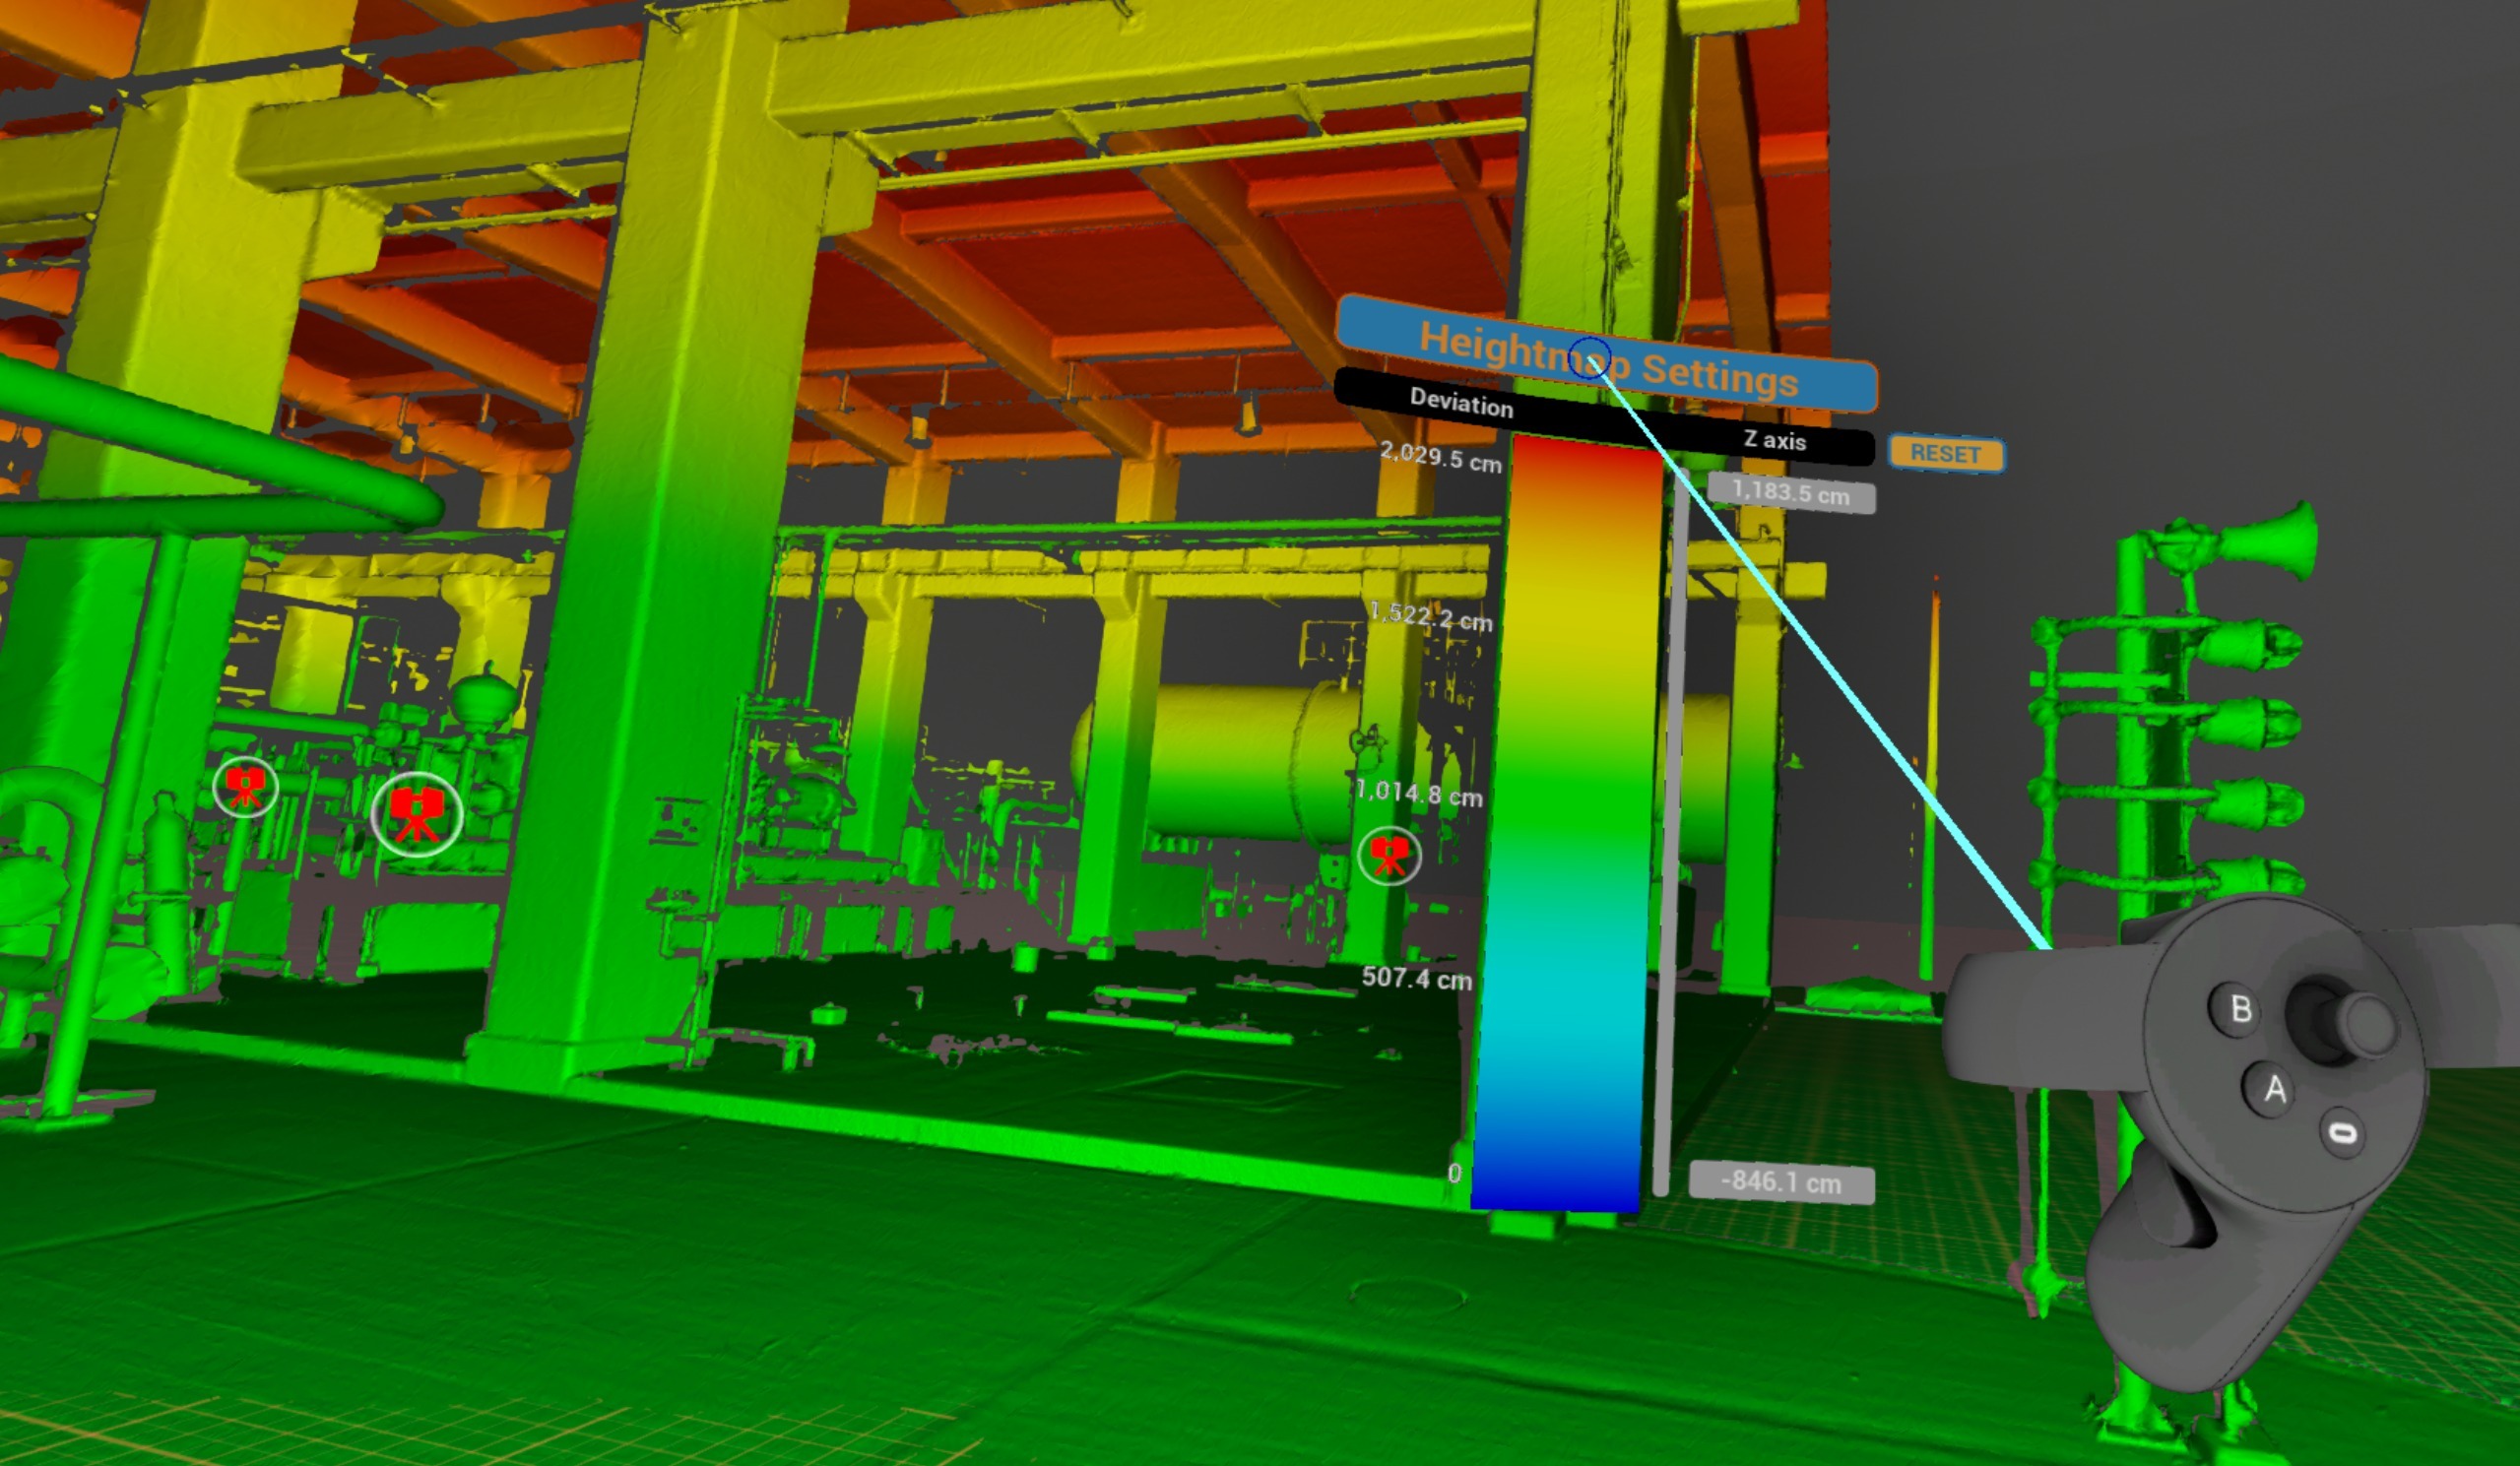
To adjust height limits point at a number and pull or push Navigation controller thumbstick.

Slide grey bar up and down to offset range set.
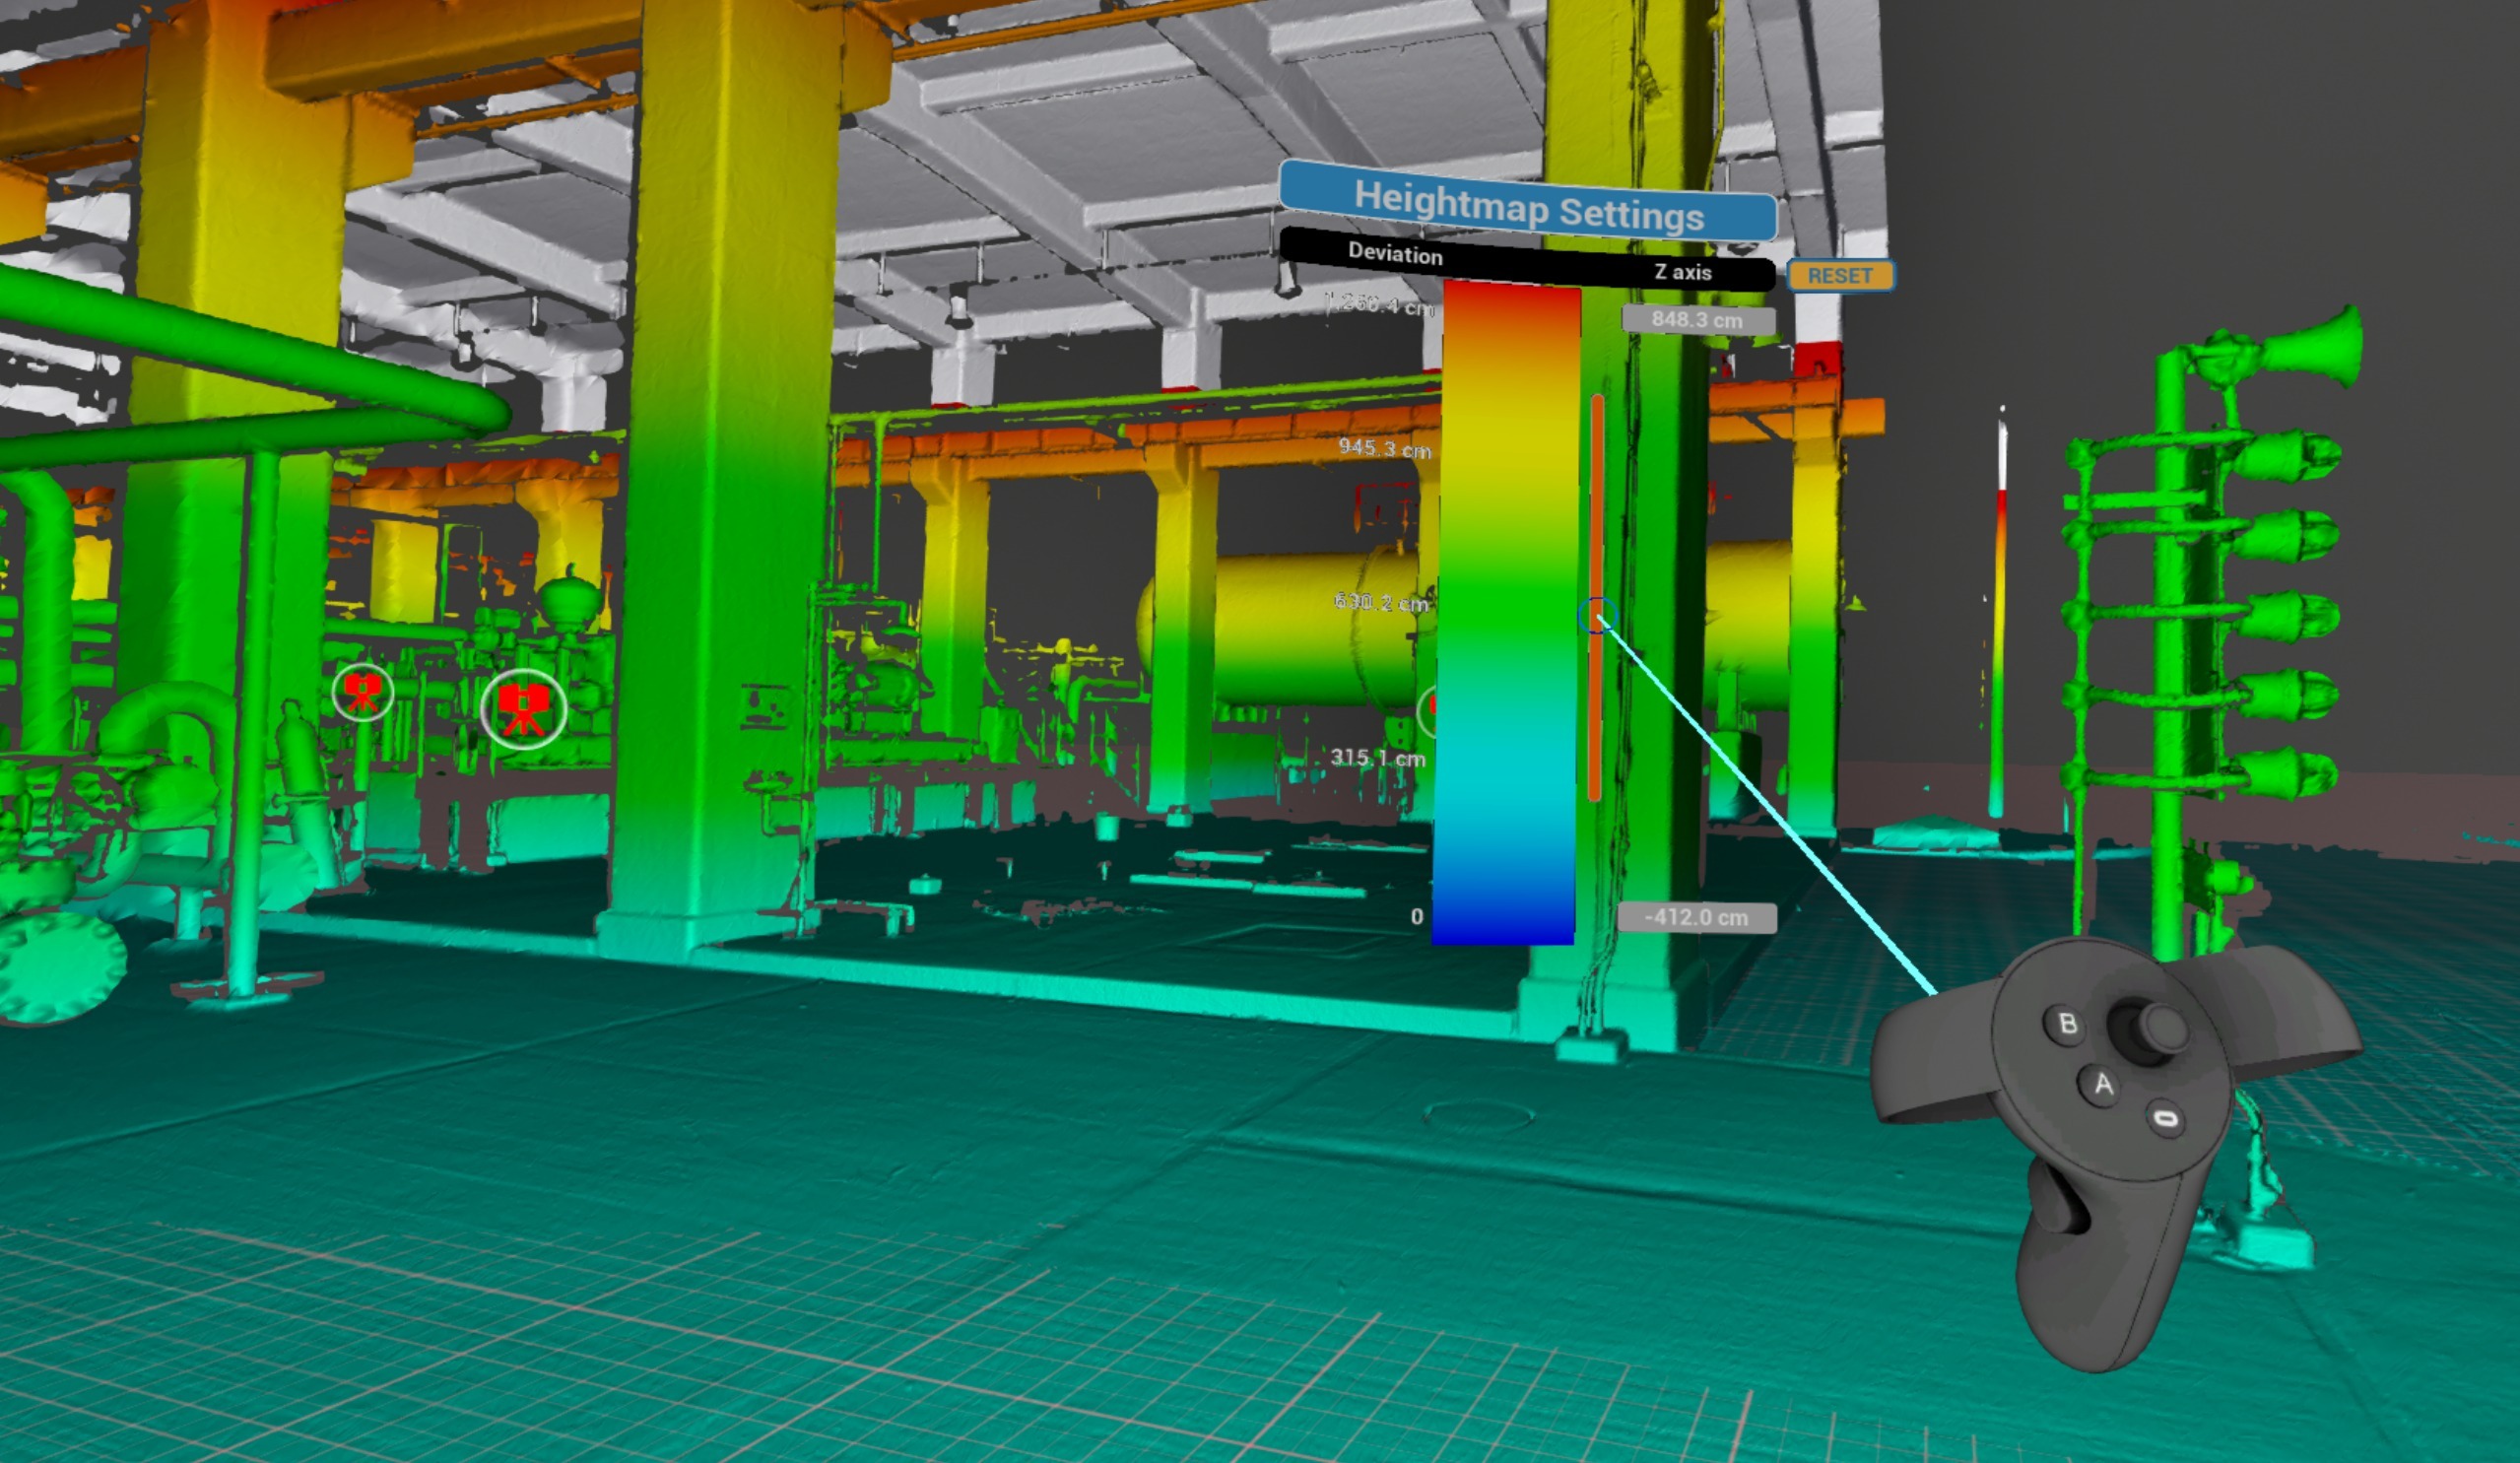
Click Reset to return to default settings.
Indoor / Outdoor
Replace sky background with a black one for indoor scenes. Can be used alongside other display modes (RGB, X-ray, Surface).
| Platform | Controls |
|---|---|
 VR VR | Switch from VR Tools Menu |
 Desktop Desktop | Available in Display Modes panel at top of screen |
 Web Web | Background color/image control |
Virtual Floor Grid
Display a reference grid on floor plane to aid spatial orientation.
| Platform | Controls |
|---|---|
 VR VR | Available |
 Igloo Igloo | Available |
Performance Options
Settings that affect rendering quality and visual output of point cloud data and 3D geometry.
Backfaces
Show or hide back-facing surfaces of 3D mesh - useful for seeing inside buildings from outside and cleaning up the scene from unnecessary mesh pieces. Can be used alongside other display modes (RGB, X-ray, Surface).
| Platform | Controls |
|---|---|
 VR VR | Switch from VR Tools Menu. |
 Desktop Desktop | Available in Display Modes panel at top of screen. |
 Igloo Igloo | Available |
 Web Web | Available |
Visual / Scan Quality
Adjust rendering quality level for point cloud scans and 3D visuals.
| Platform | Controls |
|---|---|
 VR VR | Available |
 Desktop Desktop | Available |
 Igloo Igloo | Available |
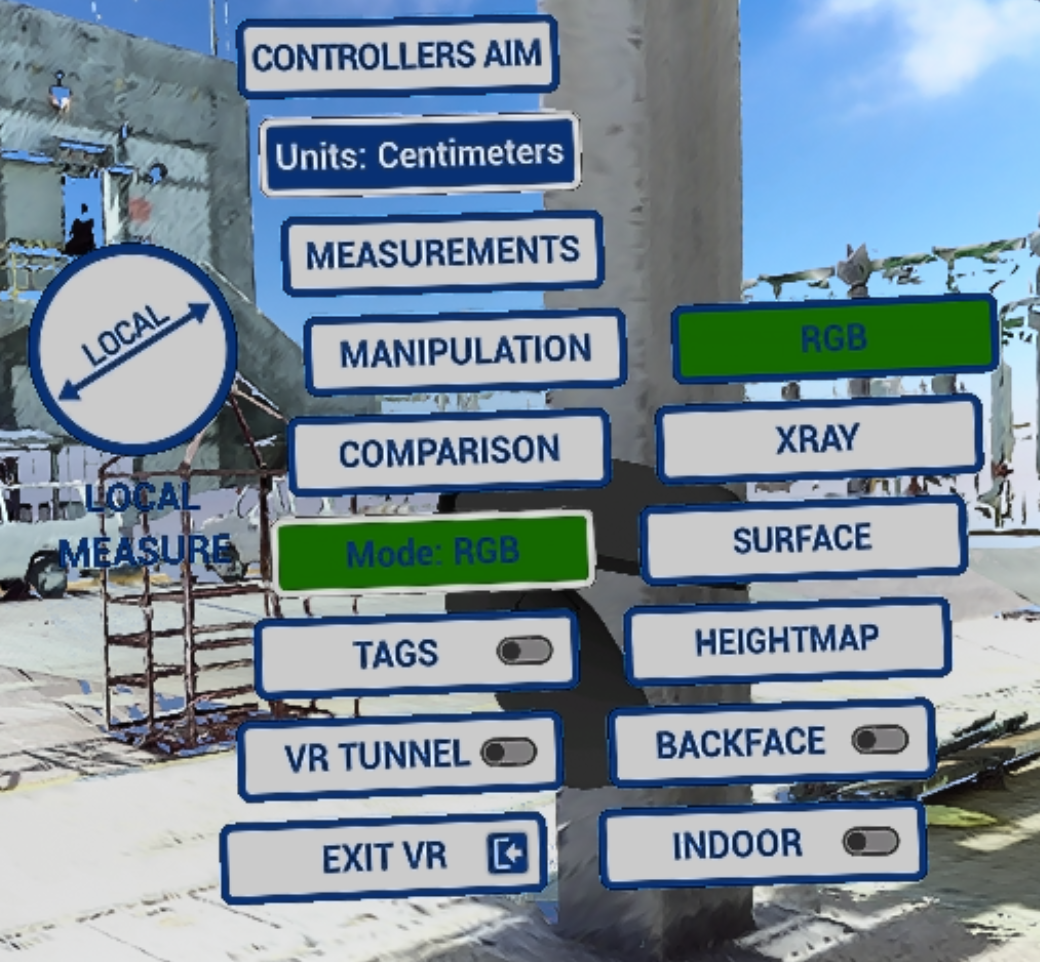
VR Werkzeugmenü
Dieses Menü dient als Hauptsteuerung zum Aktivieren/Deaktivieren von Modi und zum Zugriff auf Funktionen.
Um das VR Werkzeugmenü zu öffnen, drücken Sie auf den Daumenstick des Werkzeug controllers. 
- Richten Sie Controller-Ziel ein (mehr Infos Controller Aim)
- Ändern Sie Einheiten, die in Messungen und Höhenkartierung verwendet werden.
- Verschiedene Messungen erhalten (VR-Aktionen Messungen)
- CAD-Modelle manipulieren (noch nicht aktiviert!)
- Verwenden Sie Vergleichswerkzeuge (VR-Aktionen Vergleich). Nur visuelle Kontrolle ist verfügbar.
- Schalten Sie den Display modus um, einschließlich Heightmap, Rückseite und Indoor.
Note: switch between display modes by clicking Y button on Tools controller. Cycle Display Modes
- Aktivieren Sie Tags zur Überprüfung (VR-Aktionen Tags)
- VR Tunnel - glattere Scan-zu-Scan-Navigation und Teleportation. Weitere Details unter Optionen
- Exit VR mode – exit to Desktop mode
War dieser Artikel hilfreich?
Das ist großartig!
Vielen Dank für das Feedback
Leider konnten wir nicht helfen
Vielen Dank für das Feedback
Feedback gesendet
Wir wissen Ihre Bemühungen zu schätzen und werden versuchen, den Artikel zu korrigieren