This article describes process of adding users to a Cintoo project.
TABLE OF CONTENTS
Opening Add Member Window
Steps below are common to all three ways of adding members.
- Open the project and go to Members tab.

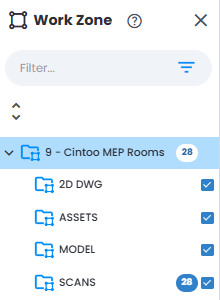
- Make sure root project folder is selected at the very top of Work Zone Explorer.
- Click Add Member button.

Add Member window opens with three tabs, one per way of adding members: Users for users already in account, Groups for every member of a group at once, and Invite New Users for people not in account yet.
Adding Individual Users
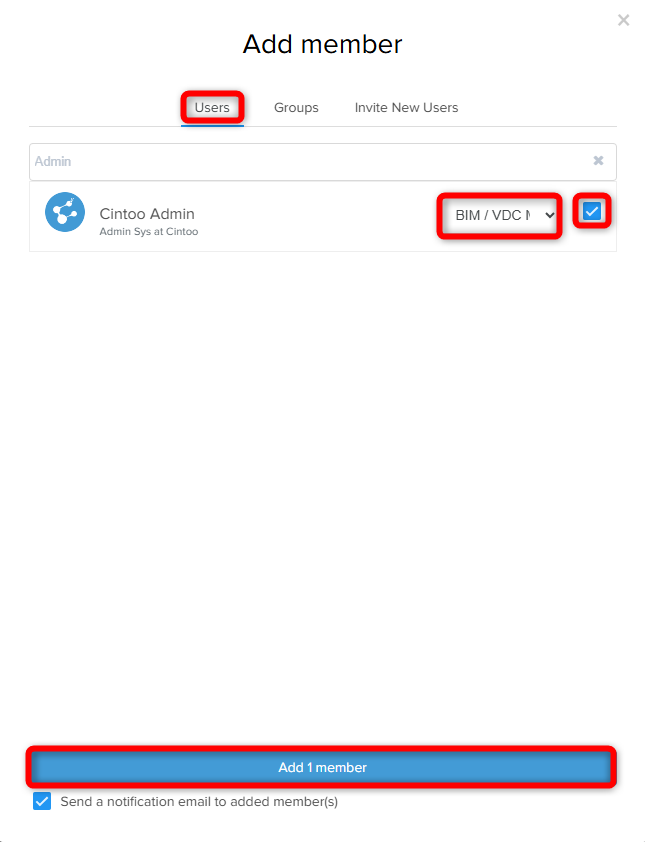
Use Users tab to add members from existing account users list.
- Click Users.
- Navigate to desired member(s) either manually or using search tool.
- Define role assignment for member(s).
- Click check box next to role drop-down menu.
- Click Add Member(s).
Adding Groups
Use Groups tab to add all users of a group to a project in one operation.
- Click Groups.
- Navigate to a desired group.
- Define a role assignment for all members included in the group.
- Click check box next to role drop-down menu.
- Click Add Member(s).

Inviting New Users
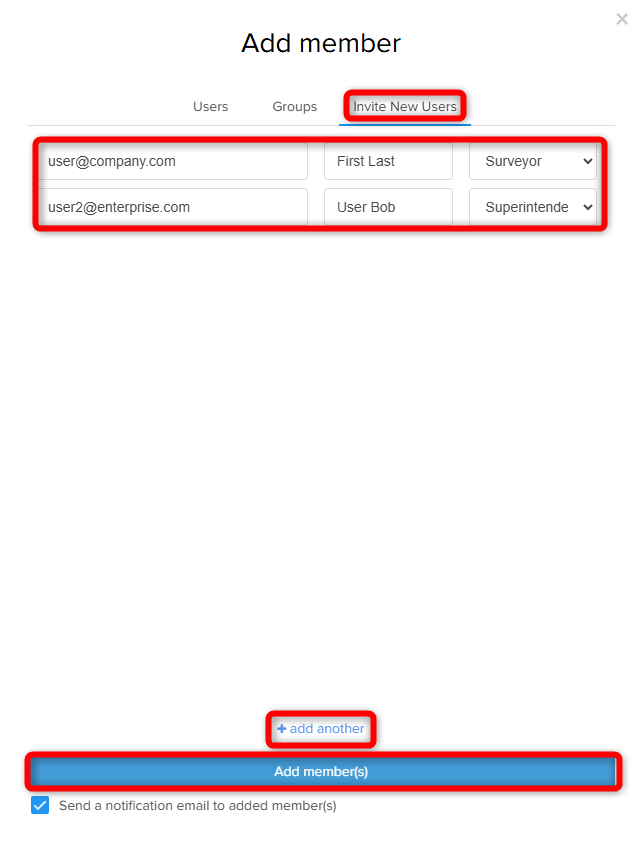
Use Invite New Users tab to add users that are not in account users list yet.
- Click Invite New Users.
- Type user's email address to send an invitation to.
- Type user's first and last name.
- Define a role assignment.
- To add multiple users at the same time click Add another and repeat steps 2-4.
- Click Add Member(s).
Alternatives
Using APIs might be an alternative instrument for adding users to a project. Discover more in the Developer documentation.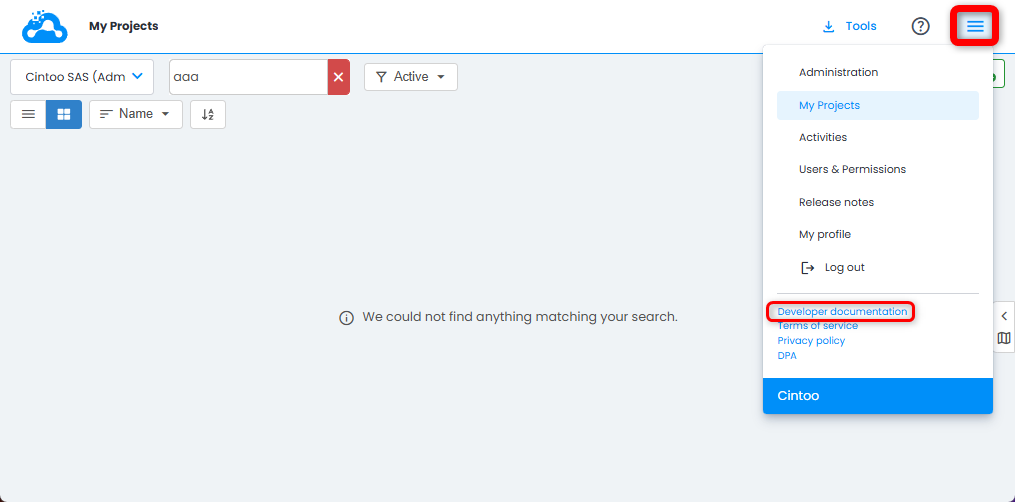
For onboarding of larger number of users upon creation of a Cintoo account, please contact your dedicated Customer Success Manager at Cintoo or Customer Support at support@cintoo.com.
Was this article helpful?
That’s Great!
Thank you for your feedback
Sorry! We couldn't be helpful
Thank you for your feedback
Feedback sent
We appreciate your effort and will try to fix the article